
Set up a Kitchen Display Screen (KDS) station in Cloud Hub so orders route straight to the right screen in your kitchen.
Before you start, you'll need:
- The Cloud Hub device you want to use as this kitchen screen, powered on and signed in.
- A manager PIN to access Settings on the device.
- To know which menu categories this screen should be responsible for making — for example Grill or Drinks.
Step 1: Open Stations & Routing
Tap your name at the bottom of the menu, then Settings, then Stations & Routing under Operations. The first time you set this up, there are no stations yet.
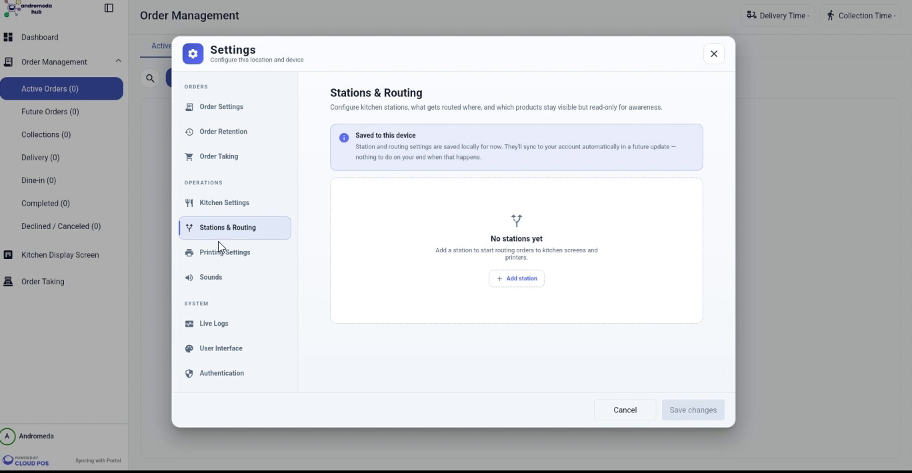
Stations & Routing — configure kitchen stations, what gets routed where, and which products stay visible but read-only for awareness.
Step 2: Tap + Add station
This adds a new station with a default name and colour, and opens it for editing straight away.
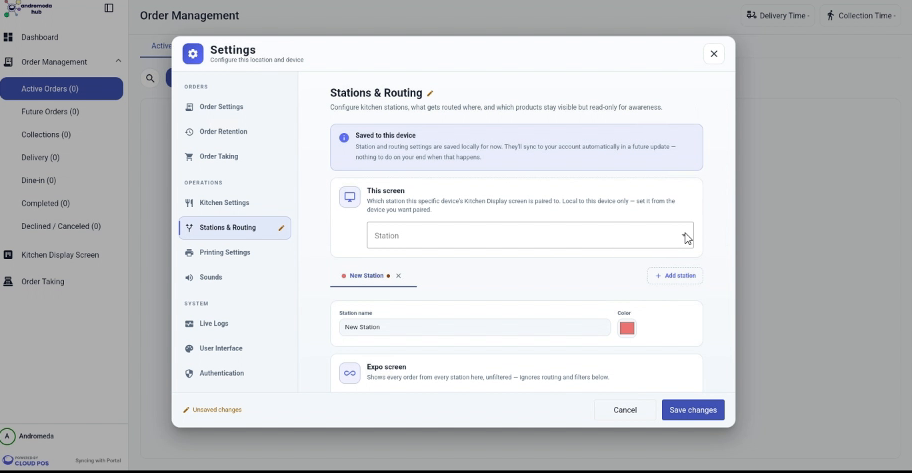
A new station is added with a default name and colour, ready to rename.
Step 3: Name the station and give it a colour
Change Station name to something staff will recognise at a glance, such as Grill, Prep or Drinks — this is what appears on tickets, in reports, and on the station tab above. Tap the colour swatch next to it to pick a preset colour, or tap More for a custom one.
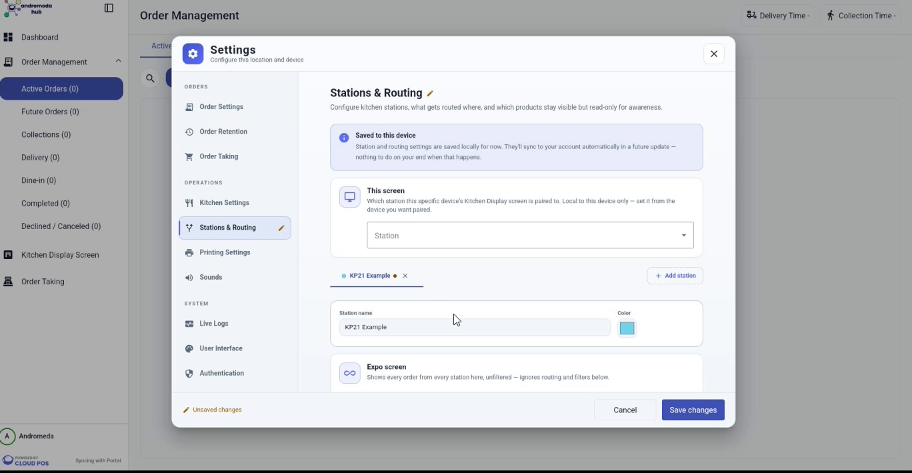
Station renamed to “KP21 Example” with a custom colour set.
Naming tip: Colour-coding stations makes them easy for staff to tell apart at a glance, both on this screen and in the station tabs when there's more than one set up.
Step 4: Pair this device to the station
Scroll back up to This screen at the top of the page. Choose the station you just created from the Station dropdown, then give this physical screen a name in Screen name — for example Kitchen Screen 1. This is what actually pairs this device's Kitchen Display Screen to the station — it's set locally on the device you're pairing, and isn't editable from anywhere else.
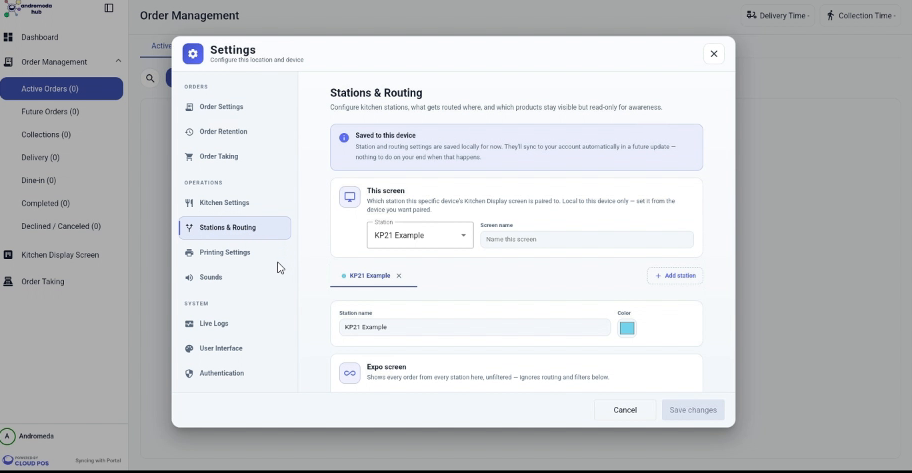
This screen — pairing the device to the “KP21 Example” station and naming the screen.
Step 5: Choose where this station's tickets go
Under Destination, leave Screen selected to send tickets to the screen you just paired, or choose Printer to print them instead (see the printer setup guides to connect one first). Turn on Expo screen only if you want this station to show every order from every station, unfiltered — leave it off so the screen only shows what's routed to it.
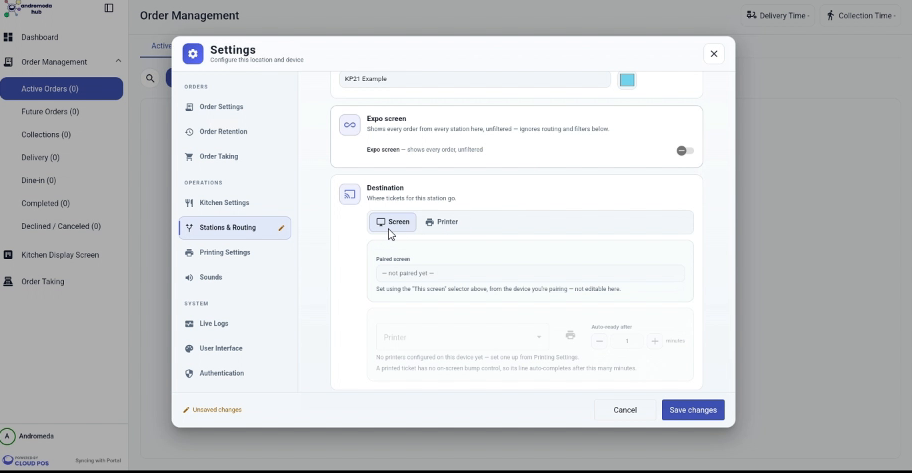
Destination — Screen sends tickets to the paired Kitchen Display Screen; Printer sends them to a configured printer instead.
Step 6: Route categories to the station
Under Routing, tick each menu category (or expand one to tick individual products) that this station is responsible for making. Anything left unticked everywhere won't appear on any kitchen screen, so make sure every category is routed somewhere.
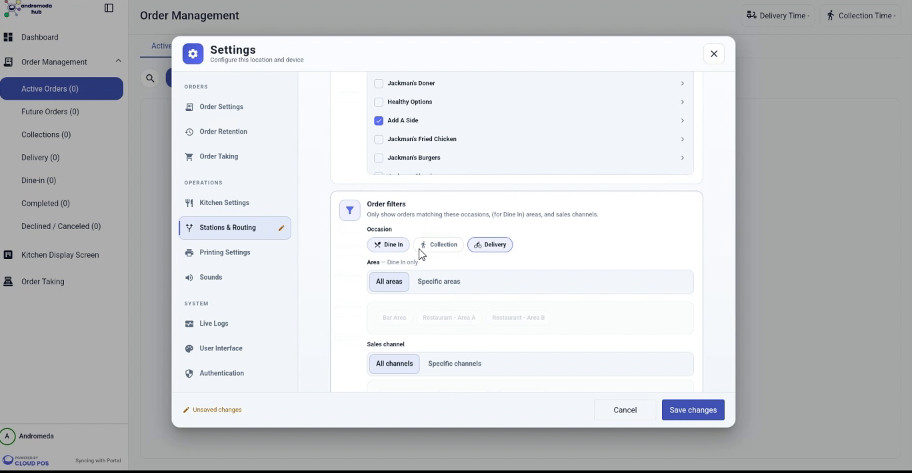
Routing — ticking which categories this station is responsible for making.
Step 7: Tap Save changes
The station is now saved and paired — tickets for anything routed to it will start appearing on this screen.
Fine-tune what the screen shows
A few more settings further down the same page let you tailor exactly what staff see on this screen:
- Read-only products — show products from other stations here for awareness, without letting staff start or complete them on this screen.
- Order filters — restrict this station to specific occasions (Dine In, Collection, Delivery), specific Dine In areas, or specific sales channels, instead of everything.
- Make by & course mode — bump items off the ticket as a Whole order or Individual product, and show a ticket as one Full ticket or Split by course (course mode isn't used when making by individual product).
- Ticket fields — toggle which details show in the ticket header, such as customer name, guest count, table/area and order type.
- Order stages shown — choose whether this screen's board shows New / not started, Ready / completed, or both.
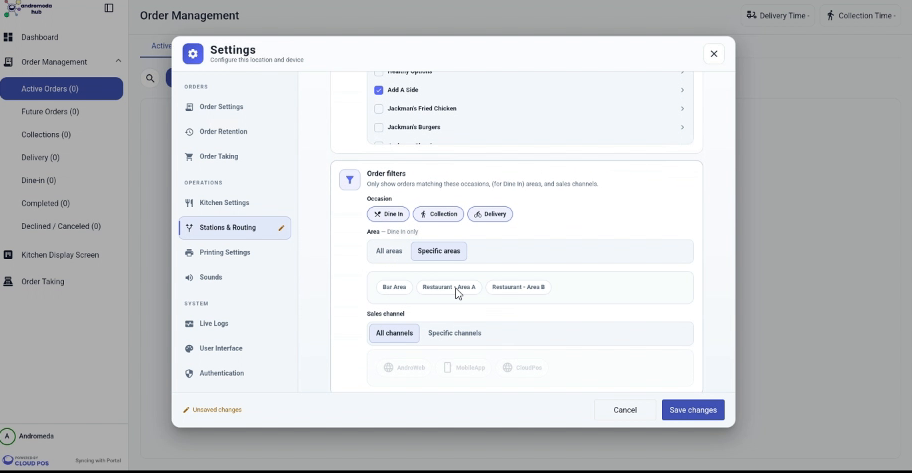
Order filters — narrowing a station to specific occasions, areas or sales channels.
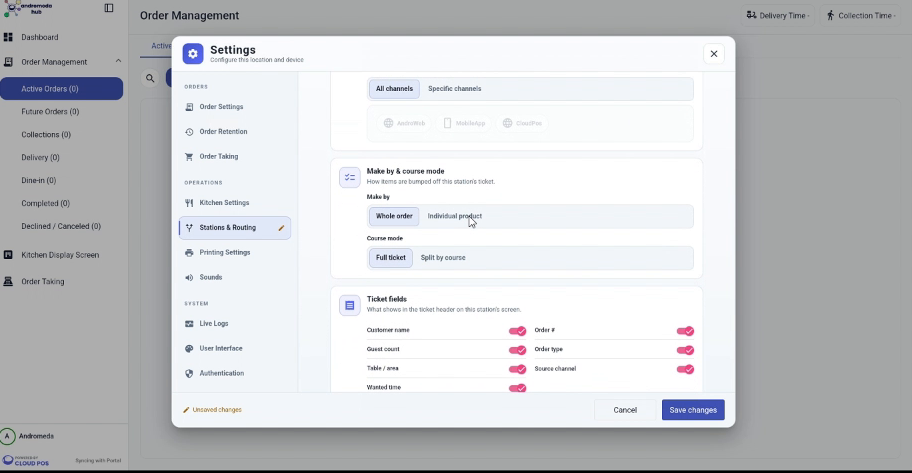
Make by & course mode, and Ticket fields — controlling how tickets are bumped and what shows in the header.
If the screen doesn't pair: Make sure you're setting This screen and Screen name from the actual device you want to use as the kitchen screen — pairing is local to that device and can't be edited from anywhere else. If Station is empty in the dropdown, add a station first using + Add station.
Removing a station: Open it in Stations & Routing and scroll to Removing this station. This unroutes everything assigned to it, so re-route any affected categories to another station first.