
← Andromeda HUB Essential – User Guide (overview & contents)
Requesting a Courier
You can request an Uber Direct courier from either the order list view or the order detail view. You do not need to wait until the order is ready — request early so the driver arrives at the right time.
- Tap ‘Request Courier’ on the order.
- The Hub requests a quote from Uber Direct, showing estimated arrival time and delivery cost.
- Tap ‘Accept’ to confirm the booking.
- The order status updates to show ‘Courier Requested’, then ‘Courier Accepted’ when the driver accepts.
Manual vs. Automatic Mode
| Mode | How It Works |
|---|---|
| Manual | Staff tap ‘Request Courier’ themselves. Best for seeing all stages during training. |
| Automatic | The Hub books the courier automatically, timed using the Average Prep Time set for this location, plus extra time added on top for any other orders already ahead of this one in the queue. |
For initial deployments, manual mode is recommended so staff can familiarise themselves with the flow before switching to automatic.
Setting Average Prep Time (Critical for Automatic Mode)
Average Prep Time is set from the Hub’s Settings screen (gear icon) under Order Settings:
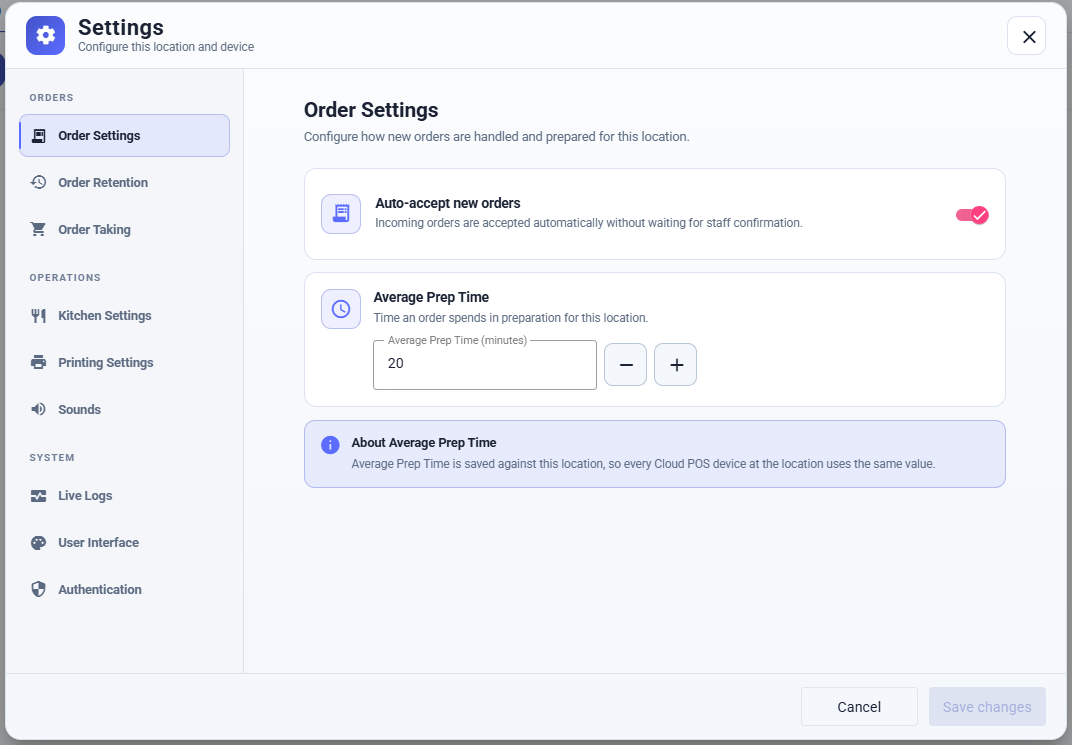
- Start with a realistic average for a normal trading period, then adjust up or down based on how early or late couriers are actually arriving.
- When several orders are queued ahead of this one, Automatic mode adds extra time on top of the Average Prep Time for each order in front — so the courier isn’t booked too early during busy periods.
Courier Details
Once a driver accepts the job, the Hub shows:
- Driver name and photo
- Driver’s phone number (call this number to reach the driver)
- PIN code — unique per order, required to connect the call through Uber’s system
- Vehicle type
- Driver location on the map at key status points (not live tracking — shown when the driver confirms pickup)
Cancelling a Courier
| Scenario | What to Do |
|---|---|
| Order won’t be ready in time — want to rebook later | Cancel the courier booking. This removes the driver and lets you request again when ready. |
| Customer has cancelled the order | Cancel the courier FIRST, then cancel the order. You cannot cancel an order that has an active courier attached to it. |
If a driver cancels: the order moves to the top of the screen with a ‘Courier Cancelled’ alert showing the reason. You then have two options:
- Remake — the order returns to Preparing status and you request a new courier.
- Cancel Order — use this if the customer no longer wants the order.
Related articles: Previous: ← Managing Orders: Status Flow | Back to overview & contents | Next: Manager Functions →